0.补充
0.1 简单的全局状态管理
方法一:使用 useReducer 取代 useState 的多次声明操作(非全局状态管理):
import { useReducer } from 'react'

type State = {
  count: number
  comment: string
}
type Action = {
  type: 'increment' | 'decrement'
  payload: number
}

const initState: State = { count: 0, comment: '' }

function countReducer(state: State, action: Action) {
  const { count, comment } = state
  const { type, payload } = action
  switch (type) {
    case 'increment': {
      // 千万注意,所有 state 中声明的对象,都要进行返回出来
      return { count: count + payload, comment: comment + payload }
    }
    case 'decrement': {
      return { count: count - payload, comment: comment + payload }
    }
  }
}

export const useCounter = () => {
  const [state, dispatch] = useReducer(countReducer, initState)
  const increment = (payload: number) => dispatch({ type: 'increment', payload })
  const decrement = (payload: number) => dispatch({ type: 'decrement', payload })
  return {
    ...state,
    increment,
    decrement
  }
}

// 使用:const { count, decrement, increment } = useCounter()
2
3
4
5
6
7
8
9
10
11
12
13
14
15
16
17
18
19
20
21
22
23
24
25
26
27
28
29
30
31
32
33
34
35
36
37
38
39
方法二:使用 useContext 实现全局状态管理 :
状态管理封装:
import { createContext, ReactNode, useContext, useState } from 'react'

// 创建上下文
const ProjectContext = createContext<
  | {
      openProject: boolean
      createProject: () => void
      deleteProject: (id: number) => void
      projectList: { id: number; content: string }[]
    }
  | undefined
>(undefined)
ProjectContext.displayName = 'ProjectContext'

// 封装提供者
export const ProjectProvider = ({ children }: { children: ReactNode }) => {
  const [openProject, setOpenProject] = useState(false)
  const [projectList, setProjectList] = useState<{ id: number; content: string }[]>([])
  const createProject = () => {
    setOpenProject(true)
    setProjectList([
      {
        id: 0,
        content: '项目一'
      },
      {
        id: 1,
        content: '项目二'
      }
    ])
    console.log('创建项目')
  }
  const deleteProject = (id: number) => {
    setProjectList(projectList.filter(project => project.id === id))
    console.log('删除项目')
  }
  return (
    <ProjectContext.Provider
      value={{ openProject, createProject, deleteProject, projectList }}
      children={children}
    />
  )
}

// 封装 context 方法实现
export const useProject = () => {
  const context = useContext(ProjectContext)
  if (!context) throw new Error('useProject 只能在 ProjectContext 中使用')
  return context
}
2
3
4
5
6
7
8
9
10
11
12
13
14
15
16
17
18
19
20
21
22
23
24
25
26
27
28
29
30
31
32
33
34
35
36
37
38
39
40
41
42
43
44
45
46
47
48
49
50
封装到 AppProviders 中:
import { ReactNode } from 'react'
import { ProjectProvider } from './project-context'

export const AppProviders = ({ children }: { children: ReactNode }) => {
  return <ProjectProvider>{children}</ProjectProvider>
}
2
3
4
5
6
index.tsx:
import React from 'react'
import ReactDOM from 'react-dom/client'
import App from './App'
import { AppProviders } from './context'

const root = ReactDOM.createRoot(document.getElementById('root') as HTMLElement)
root.render(
  <React.StrictMode>
    <AppProviders>
      <App />
    </AppProviders>
  </React.StrictMode>
)
2
3
4
5
6
7
8
9
10
11
12
13
App.tsx:
const project = useProject()
return (
  <div className='App'>
    <Button onClick={project.createProject}>创建新项目</Button>
    <Button onClick={() => project.deleteProject(0)}>删除项目</Button>
    {project.openProject ? (
      <Card>
        <Typography.Text>
          {project.projectList.map(project => (
            <Fragment>
              {project.id}-{project.content}
            </Fragment>
          ))}
        </Typography.Text>
      </Card>
    ) : null}
    {count}
    <Button onClick={() => increment(10)}>click to add count</Button>
    <Button onClick={() => decrement(10)}>click to decrement count</Button>
  </div>
)
2
3
4
5
6
7
8
9
10
11
12
13
14
15
16
17
18
19
20
21
1.前置准备
1.1 初始化
- 安装 ts 版的 react 项目:
create-react-app jira --template typescript - 安装 prettier:
npm install --save-dev --save-exact prettier - 新建:
echo {}> .prettierrc.json - 在代码提交之前,自动对代码进行格式化:
mrm lint-staged,下为 package.json
"lint-staged": {
    "*.{js,css,md,ts,tsx}": "prettier --write"
  }
2
3
- 安装:
npm i eslint-config-prettier -D,下为 package.json
"eslintConfig": {
  "extends": [
    "react-app",
    "react-app/jest",
    "prettier"
  ]
}
2
3
4
5
6
7
- 安装:
npm install --save-dev @commitlint/config-conventional @commitlint/cli,并运行命令:echo "module.exports = {extends: ['@commitlint/config-conventional']}" > commitlint.config.js - 输入:
npx husky add .husky/commit-msg "npx --no -- commitlint --edit ${1}"
1.2 mock 方案
使用 json-server 来实现
REST API:
GET / tickets // 列表
GET / tickets / 12 // 详情
POST / tickets // 增加
PUT / tickets / 12 // 替换
PATCH / tickets / 12 // 修改
DELETE / tickets / 12 // 删除
2
3
4
5
6
- 全局安装:
npm i json-server -g - 项目根目录新建
__json_server_mock__/db.json - package.json:
"json-server": "json-server __json_server_mock__/db.json --watch --port 3001"
1.3 用 jsx 写一个工程列表功能
index.jsx:
import { useEffect, useState } from 'react'
import qs from 'qs'
import { SearchPanel } from './search-panel'
import { List } from './list'
import { cleanObject } from 'utils'

const apiUrl = process.env.REACT_APP_API_URL

export const ProjectListScreen = () => {
  // 用户
  const [users, setUsers] = useState([])

  // 用户名与其 id
  const [param, setParam] = useState({
    name: '',
    personId: ''
  })

  // 项目
  const [list, setList] = useState([])

  useEffect(() => {
    // 每次 param 已更改就会立即调用 fetch 更新数据
    fetch(`${apiUrl}/projects?${qs.stringify(cleanObject(param))}`).then(
      async response => {
        if (response.ok) {
          setList(await response.json())
        }
      }
    )
  }, [param])

  useEffect(() => {
    fetch(`${apiUrl}/users`).then(async response => {
      if (response.ok) {
        setUsers(await response.json())
      }
    })
  }, [])

  return (
    <div>
      <SearchPanel param={param} setParam={setParam} users={users} />
      <List users={users} list={list} />
    </div>
  )
}
2
3
4
5
6
7
8
9
10
11
12
13
14
15
16
17
18
19
20
21
22
23
24
25
26
27
28
29
30
31
32
33
34
35
36
37
38
39
40
41
42
43
44
45
46
47
search-panel.jsx:
export const SearchPanel = ({ param, setParam, users }) => {
  return (
    <form>
      <div>
        {/* setParam(Object.assign({}, param, { name: evt.target.value })) */}
        <input
          type='text'
          value={param.name}
          onChange={evt =>
            setParam({
              ...param,
              name: evt.target.value
            })
          }
        />
        <select
          value={param.personId}
          onChange={evt =>
            setParam({
              ...param,
              personId: evt.target.value
            })
          }>
          <option value={''}>负责人</option>
          {users.map(user => (
            <option key={user.id} value={user.id}>
              {user.name}
            </option>
          ))}
        </select>
      </div>
    </form>
  )
}
2
3
4
5
6
7
8
9
10
11
12
13
14
15
16
17
18
19
20
21
22
23
24
25
26
27
28
29
30
31
32
33
34
list.jsx:
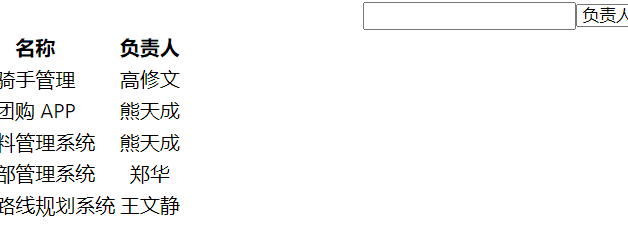
export const List = ({ list, users }) => {
  return (
    <table>
      <thead>
        <tr>
          <th>名称</th>
          <th>负责人</th>
        </tr>
      </thead>
      <tbody>
        {list.map(project => (
          <tr key={project.id}>
            <td>{project.name}</td>
            <td>{users.find(user => user.id === project.personId)?.name || '未知'}</td>
          </tr>
        ))}
      </tbody>
    </table>
  )
}
2
3
4
5
6
7
8
9
10
11
12
13
14
15
16
17
18
19
20
1.4 自定义防抖 hook 和 useMount 的 hook
// 模拟 mount 的 hook
export const useMount = callback => {
  useEffect(() => {
    callback()
    //eslint-disable-next-line react-hooks/exhaustive-deps
  }, [])
}

// 防抖
export const useDebounce = (value, delay) => {
  const [debouncedValue, setDebouncedValue] = useState(value)
  useEffect(() => {
    // 每次在 value 变化以后,设置一个定时器
    const timeout = setTimeout(() => setDebouncedValue(value), delay)
    // 每次在上一个 useEffect 处理完以后再运行(react 特性来的,相当于 componentDidUnmount)
    return () => clearTimeout(timeout)
  }, [value, delay])
  return debouncedValue
}

const debouncedParam = useDebounce(param, 2000)

useEffect(() => {
  // 每次 param 已更改就会立即调用 fetch 更新数据
  fetch(`${apiUrl}/projects?${qs.stringify(cleanObject(debouncedParam))}`).then(
    async response => {
      if (response.ok) {
        setList(await response.json())
      }
    }
  )
}, [debouncedParam])
2
3
4
5
6
7
8
9
10
11
12
13
14
15
16
17
18
19
20
21
22
23
24
25
26
27
28
29
30
31
32
1.5 commit 提交规范
- feat: 新功能、新特性
- fix: 修改 bug
- perf: 更改代码,以提高性能(在不影响代码内部行为的前提下,对程序性能进行优化)
- refactor: 代码重构(重构,在不影响代码内部行为、功能下的代码修改)
- docs: 文档修改
- style: 代码格式修改, 注意不是 css 修改(例如分号修改)
- test: 测试用例新增、修改
- build: 影响项目构建或依赖项修改
- revert: 恢复上一次提交
- ci: 持续集成相关文件修改
- chore: 其他修改(不在上述类型中的修改)
- release: 发布新版本
- workflow: 工作流相关文件修改
2TypeScript
2.1 js 改造成 ts
qs 库没有声明 ts 的文件的解决办法:
- 安装:
npm i -D @types/qs - enjoy it!
没有能力解决的 ts 类型问题(下下策):
// @ts-ignore
给 useDebounce 添加泛型:
泛型就是在调用函数时传入参数的类型
// 防抖
export const useDebounce = <V>(value: V, delay?: number) => {
  const [debouncedValue, setDebouncedValue] = useState(value)
  useEffect(() => {
    // 每次在 value 变化以后,设置一个定时器
    const timeout = setTimeout(() => setDebouncedValue(value), delay)
    // 每次在上一个 useEffect 处理完以后再运行
    return () => clearTimeout(timeout)
  }, [value, delay])
  // 返回类型也是 V 了
  return debouncedValue
}

// 用户名与其 id
const [param, setParam] = useState({
  name: '',
  personId: ''
})
const debouncedParam = useDebounce(param, 200)
2
3
4
5
6
7
8
9
10
11
12
13
14
15
16
17
18
19
2.2 Hook - 泛型 - 数组操作 demo(重要)
import { useState } from 'react'

function App() {
  const useArray = <T>(initialArray: T[]) => {
  const [value, setValue] = useState(initialArray)
  return {
    value,
    setValue,
    add: (item: T) => setValue([...value, item]),
    clear: () => setValue([]),
    removeIndex: (index = 0) => setValue(value.slice(index + 1))
  }
}

  const persons: { name: string; age: number }[] = [
    { name: 'jack', age: 25 },
    { name: 'ma', age: 22 }
  ]
  const { value, add, clear, removeIndex } = useArray(persons)

  return (
    <div>
      <button onClick={() => add({ name: 'john', age: 22 })}>add john</button>
      <button onClick={() => removeIndex(0)}>remove 0</button>
      <button style={{ marginBottom: '50px' }} onClick={clear}>
        clear
      </button>
      {value.map((person, index) => (
        <div key={index} style={{ marginBottom: '30px' }}>
          <span style={{ color: 'red' }}>{index}</span>
          <span>{person.name}</span>
          <span>{person.age}</span>
        </div>
      ))}
    </div>
  )
}

export default App
2
3
4
5
6
7
8
9
10
11
12
13
14
15
16
17
18
19
20
21
22
23
24
25
26
27
28
29
30
31
32
33
34
35
36
37
38
39
2.3 TypeScript 的鸭子类型
Duck Typing
interface Base {
  id: number
}
interface Advance extends Base {
  name: string
}
const test = (p: Base) => {}
// 鸭子类型(duck typing) - 面向接口编程,而不是面向对象编程
const a: Advance = { id: 1, name: 'yuanke' }
test(a) // 不会报错!!!
2
3
4
5
6
7
8
9
10
2.4 json-server 注入登录中间件
由于 json-server 只支持模拟 restful api 的请求,对于登录这种明显违反 restful api 的请求是无法返回的。故使用中间件解决此问题
发送请求:
const handleSubmit = (event: FormEvent<HTMLFormElement>) => {
  event.preventDefault()
  const username = (event.currentTarget.elements[0] as HTMLInputElement).value
  const password = (event.currentTarget.elements[1] as HTMLInputElement).value
  login({ username, password })
}
2
3
4
5
6
_json_server_mock__/middleware.js:
module.exports = (req, res, next) => {
  if (req.method === 'POST' && req.path === '/login') {
    if (req.body.username === 'jack' && req.body.password === '123456') {
      return res.status(200).json({
        user: {
          token: '123'
        }
      })
    } else {
      return res.status(400).json({ message: '用户名或者密码错误' })
    }
  }
  next()
}
2
3
4
5
6
7
8
9
10
11
12
13
14
package.json:
"json-server": "json-server __json_server_mock__/db.json --watch --port 3001 --middlewares __json_server_mock__/middleware.js"
2.5 auth 服务文件开发
包括了登录、注册、注销等功能的实现
auth-provider.ts:
// 在真实环境中,如果使用 firebase 这种第三方 auth 服务的话,不需要开发者开发

import { User } from 'screens/project-list/search-panel'
const apiUrl = process.env.REACT_APP_API_URL

// token
const localStorageKey = '__auth_provider_token__'

// 获取 token
export const getToken = () => window.localStorage.getItem(localStorageKey)

// 设置 token
export const handleUserResponse = ({ user }: { user: User }) => {
  window.localStorage.setItem(localStorageKey, user.token || '')
  return user
}

// 登录逻辑,登录成功则保存用户的 token
export const login = (data: { username: string; password: string }) => {
  fetch(`${apiUrl}/login`, {
    method: 'POST',
    headers: {
      'Content-Type': 'application/json'
    },
    body: JSON.stringify(data)
  }).then(async response => {
    if (response.ok) {
      return handleUserResponse(await response.json())
    }
  })
}

// 注册逻辑,注册成功则保存用户的 token
export const register = (data: { username: string; password: string }) => {
  fetch(`${apiUrl}/register`, {
    method: 'POST',
    headers: {
      'Content-Type': 'application/json'
    },
    body: JSON.stringify(data)
  }).then(async response => {
    if (response.ok) {
      return handleUserResponse(await response.json())
    }
  })
}

// 登出逻辑,登出成功则清除本地 token
export const logout = () => window.localStorage.removeItem(localStorageKey)
2
3
4
5
6
7
8
9
10
11
12
13
14
15
16
17
18
19
20
21
22
23
24
25
26
27
28
29
30
31
32
33
34
35
36
37
38
39
40
41
42
43
44
45
46
47
48
49
2.6 point free 风格
function log(str) {
  console.log('haha', str)
}

// 下面两个的形式是等价的,对比可以发现下面第一个式子的 function 部分完全与上面一致,所以可以简写成下面的第二个式子
Promise.resolve('666').then(function (str) {
  log(str)
})
Promise.resolve('666').then(log)
2
3
4
5
6
7
8
9
2.7 封装 fetch 请求方法
src/util/http.ts:
import qs from 'qs'
import * as auth from 'auth-provider'
import { useAuth } from 'context/auth-context'

const apiUrl = process.env.REACT_APP_API_URL

// RequestInit 是 fetch 的 config 区域的类型
interface Config extends RequestInit {
  token?: string
  data?: object
}

export const http = async (
  endpoint: string,
  { data, token, headers, ...customConfig }: Config = {}
) => {
  const config = {
    method: 'GET',
    headers: {
      Authorization: token ? `Bearer ${token}` : '',
      'Content-Type': data ? 'application/json' : ''
    },
    // 注意看,customConfig 如果有 POST 的 method,就会覆盖上面的 GET
    ...customConfig
  }

  if (config.method.toUpperCase() === 'GET') {
    endpoint += `?${qs.stringify(data)}`
  } else {
    config.body = JSON.stringify(data || {})
  }

  // axios 和 fetch 表现不一样,axios 可以直接在返回状态不为 2xx 的时候抛出异常
  return window.fetch(`${apiUrl}/${endpoint}`, config).then(async response => {
    if (response.status === 401) {
      // token 失效
      await auth.logout()
      window.location.reload()
      return Promise.reject({ message: '请重新登录' })
    }
    const data = await response.json()
    if (response.ok) {
      return data
    } else {
      // fetch 必须手动抛出异常
      return Promise.reject(data)
    }
  })
}

export const useHttp = () => {
  const { user } = useAuth()
  // TODO: 讲解 TS 操作符
  return (...[endpoint, config]: Parameters<typeof http>) =>
    http(endpoint, { ...config, token: user?.token })
}
2
3
4
5
6
7
8
9
10
11
12
13
14
15
16
17
18
19
20
21
22
23
24
25
26
27
28
29
30
31
32
33
34
35
36
37
38
39
40
41
42
43
44
45
46
47
48
49
50
51
52
53
54
55
56
2.8 使用 useContext 管理登录相关逻辑
src/context/auth-context.tsx:
import { ReactNode, useState } from 'react'
import * as auth from 'auth-provider'
import { User } from 'screens/project-list/search-panel'
import React from 'react'
import { http } from 'utils/http'
import { useMount } from 'utils'

interface AuthForm {
  username: string
  password: string
}

// 去 localStorage 找 token 并将信息返回
const bootstrapUser = async () => {
  let user = null
  const token = auth.getToken()
  if (token) {
    const data = await http('me', { token })
    user = data.user
  }
  return user
}

// 创建一个登录的上下文状态进行相关数据的保存
const AuthContext = React.createContext<
  | {
      user: User | null
      register: (form: AuthForm) => Promise<void>
      login: (form: AuthForm) => Promise<void>
      logout: () => Promise<void>
    }
  | undefined
>(undefined)
AuthContext.displayName = 'AuthContext'

// 封装登录相关的 Provider 组件(包裹 <App /> 达到注入全局状态的效果)
export const AuthProvider = ({ children }: { children: ReactNode }) => {
  const [user, setUser] = useState<User | null>(null)
  const login = (form: AuthForm) => auth.login(form).then(setUser)
  const register = (form: AuthForm) => auth.register(form).then(setUser)
  const logout = () => auth.logout().then(() => setUser(null))
  // 每次加载时查看是否 token 失效
  useMount(() => {
    bootstrapUser().then(setUser)
  })
  return (
    <AuthContext.Provider
      children={children}
      value={{ user, login, register, logout }}
    />
  )
}

// hook 方法,可以调用 AuthContext 的方法
export const useAuth = () => {
  const context = React.useContext(AuthContext)
  if (!context) {
    throw new Error('useAuth 必须在 AuthProvider 中使用')
  }
  return context
}
2
3
4
5
6
7
8
9
10
11
12
13
14
15
16
17
18
19
20
21
22
23
24
25
26
27
28
29
30
31
32
33
34
35
36
37
38
39
40
41
42
43
44
45
46
47
48
49
50
51
52
53
54
55
56
57
58
59
60
61
入口文件 src/context/index.ts:
import { ReactNode } from 'react'
import { AuthProvider } from './auth-context'

export const AppProviders = ({ children }: { children: ReactNode }) => {
  return <AuthProvider>{children}</AuthProvider>
}
2
3
4
5
6
index.tsx:
import React from 'react'
import ReactDOM from 'react-dom/client'
import './index.css'
import App from './App'
import { loadDevTools } from 'jira-dev-tool'
import { AppProviders } from 'context'

const root = ReactDOM.createRoot(document.getElementById('root') as HTMLElement)
loadDevTools(() =>
  root.render(
    <React.StrictMode>
      <AppProviders>
        <App />
      </AppProviders>
    </React.StrictMode>
  )
)
2
3
4
5
6
7
8
9
10
11
12
13
14
15
16
17
2.9 TS 的联合类型、Partial 和 Omit 介绍
类型别名和 interface 区别:
- 定义联合类型和交叉类型的时候(
|和&),interface 无法替代 type - interface 没法实现 utility type
Parameters 讲解:
将函数的参数以 tuple 的形式提取出来
function fun1(a: number, b: string, c: { name: string }) {
  console.log(a, b, c)
}

const useFun1 = () => {
  return ([aa, bb, cc]: Parameters<typeof fun1>) => ({ aa, bb, cc })
}
2
3
4
5
6
7
一些其他的 utility type:
type Person = {
  name: string
  age: number
}

// 全部类型都为可选类型
const xiaoming: Partial<Person> = { name: 'xiaoming' }
// 排除一个类型,这是操作键值对的
const shenMiRen: Omit<Person, 'name'> = { age: 18 }
// 挑选一个类型
const xiaozhang: Pick<Person, 'name'> = { name: 'yuanke' }

type PersonKeys = keyof Person // 'name' | 'age'
// 这是操作联合类型的
type Age = Exclude<PersonKeys, 'name'> // 'age'
2
3
4
5
6
7
8
9
10
11
12
13
14
15
2.10 一些 utility type 的源码实现
Partial 实现:
type Partial1<T> = {
  [P in keyof T]?: T[P]
}
2
3
Pick 实现:
type Pick1<T, K extends keyof T> = {
  [P in K]: T[P]
}
2
3
Exclude 实现:
// 遍历类型 T,发现有 'name' 和 'age'。'name' 属于 'name',则返回 never;'age' 不属于 'name',得到保留
type Exclude1<T, U> = T extends U ? never : T
2
Omit 实现:
type Omit1<T, K extends keyof any> = Pick<T, Exclude<keyof T, K>>
3.css in js
3.1 grid 和 flex 示例
- 安装:
yarn add @emotion/react @emotion/styled以支持 css in js - 使用 grid 实现布局:
import styled from '@emotion/styled'
import { useAuth } from 'context/auth-context'
import { ProjectListScreen } from 'screens/project-list'

export const AuthenticateApp = () => {
  const { logout } = useAuth()
  return (
    <Container>
      <Header>
        <button onClick={logout}>登出</button>
      </Header>
      <Nav>nav</Nav>
      <Main>
        <ProjectListScreen />
      </Main>
      <Aside>aside</Aside>
      <Footer>footer</Footer>
    </Container>
  )
}

const Container = styled.div`
  display: grid;
  grid-template-rows: 6rem 1fr 6rem;
  grid-template-columns: 20rem 1fr 20rem;
  grid-template-areas: 'header header header' 'nav main aside' 'footer footer footer';
  grid-gap: 10rem;
  height: 100vh;
`

const Header = styled.header`
  grid-area: header;
`
const Main = styled.main`
  grid-area: main;
`
const Nav = styled.nav`
  grid-area: nav;
`
const Aside = styled.aside`
  grid-area: aside;
`
const Footer = styled.footer`
  grid-area: footer;
`
2
3
4
5
6
7
8
9
10
11
12
13
14
15
16
17
18
19
20
21
22
23
24
25
26
27
28
29
30
31
32
33
34
35
36
37
38
39
40
41
42
43
44
45
- 完整版:
authenticated.tsx:
import styled from '@emotion/styled'
import { Row } from 'components/lib'
import { useAuth } from 'context/auth-context'
import { ProjectListScreen } from 'screens/project-list'

export const AuthenticateApp = () => {
  const { logout } = useAuth()
  return (
    <Container>
      <Header between={true}>
        <HeaderLeft gap={true}>
          <h3>Logo</h3>
          <h3>项目</h3>
          <h3>用户</h3>
        </HeaderLeft>
        <HeaderRight>
          <button onClick={logout}>登出</button>
        </HeaderRight>
      </Header>
      <Main>
        <ProjectListScreen />
      </Main>
    </Container>
  )
}

const Container = styled.div`
  display: grid;
  grid-template-rows: 6rem 1fr 6rem;
  height: 100vh;
`

const Header = styled(Row)``
const HeaderLeft = styled(Row)``
const HeaderRight = styled.div``
const Main = styled.main``
2
3
4
5
6
7
8
9
10
11
12
13
14
15
16
17
18
19
20
21
22
23
24
25
26
27
28
29
30
31
32
33
34
35
36
src/components/lib.tsx:
import styled from '@emotion/styled'

export const Row = styled.div<{
  gap?: number | boolean
  between?: boolean
  marginBottom?: number
}>`
  display: flex;
  align-items: center;
  justify-content: ${props => (props.between ? 'space-between' : undefined)};
  margin-bottom: ${props => props.marginBottom + 'rem'};
  > * {
    margin-top: 0 !important;
    margin-bottom: 0 !important;
    margin-right: ${props =>
      typeof props.gap === 'number'
        ? props.gap + 'rem'
        : props.gap
        ? '2rem'
        : undefined};
  }
`
2
3
4
5
6
7
8
9
10
11
12
13
14
15
16
17
18
19
20
21
22
4.体验优化
4.1 给页面添加 Loading 和 Error 状态
- 在请求前设置
isLoading为true,请求结束后设置为false
const [isLoading, setIsLoading] = useState(false)

useEffect(() => {
  setIsLoading(true)
  client('projects', { data: cleanObject(debouncedParam) })
    .then(setList)
    .finally(() => setIsLoading(false))
  // eslint-disable-next-line
}, [debouncedParam])
2
3
4
5
6
7
8
9
- 当
isLoading为true时,Table组件应该显示 Loading 条,但是Table组件在子组件中,且Table组件有Loading属性。这时候有两种思路:一、传入isLoading值到子组件的Table组件中;二、将Table属性暴露出去。这里使用方法二:
// 子组件
interface ListProps extends TableProps<Project> {
  users: User[]
}
export const List = ({ users, ...props }: ListProps) => {
  return (
    <Table
      rowKey={'id'}
      pagination={false}
      columns={[
        {
          title: '名称',
          dataIndex: 'name',
          sorter: (a, b) => a.name.localeCompare(b.name)
        },
        {
          title: '负责人',
          render(value, project) {
            return (
              <span>
                {users.find(user => user.id === project.personId)?.name || '未知'}
              </span>
            )
          }
        }
      ]}
      {...props}
    />
  )
}

// 父组件,传入 isLoading 值和 dataSource 值都会自动并入到 {...props} 中去
;<List loading={isLoading} users={users} dataSource={list} />
2
3
4
5
6
7
8
9
10
11
12
13
14
15
16
17
18
19
20
21
22
23
24
25
26
27
28
29
30
31
32
33
包括错误处理的全部代码:
父组件:
import { useEffect, useState } from 'react'
import { SearchPanel } from './search-panel'
import { List } from './list'
import { cleanObject, useDebounce, useMount } from 'utils'
import { useHttp } from 'utils/http'
import { Typography } from 'antd'

export const ProjectListScreen = () => {
  const [users, setUsers] = useState([])
  const [isLoading, setIsLoading] = useState(false)
  const [error, setError] = useState<null | Error>(null)
  const [param, setParam] = useState({
    name: '',
    personId: ''
  })
  const [list, setList] = useState([])
  const debouncedParam = useDebounce(param, 200)
  const client = useHttp()

  useEffect(() => {
    setIsLoading(true)
    client('projects', { data: cleanObject(debouncedParam) })
      .then(setList)
      .catch(error => {
        setList([])
        setError(error)
      })
      .finally(() => setIsLoading(false))
    // eslint-disable-next-line
  }, [debouncedParam])

  useMount(() => {
    client('users').then(setUsers)
  })

  return (
    <div>
      <h1>项目列表</h1>
      <SearchPanel param={param} setParam={setParam} users={users} />
      {error ? (
        <Typography.Text type={'danger'}>{error.message}</Typography.Text>
      ) : null}
      <List loading={isLoading} users={users} dataSource={list} />
    </div>
  )
}
2
3
4
5
6
7
8
9
10
11
12
13
14
15
16
17
18
19
20
21
22
23
24
25
26
27
28
29
30
31
32
33
34
35
36
37
38
39
40
41
42
43
44
45
46
子组件:
import { Table, TableProps } from 'antd'
import { User } from './search-panel'

export interface Project {
  id: string
  name: string
  personId: string
  pin: boolean
  organization: string
}

interface ListProps extends TableProps<Project> {
  users: User[]
}

export const List = ({ users, ...props }: ListProps) => {
  return (
    <Table
      rowKey={'id'}
      pagination={false}
      columns={[
        {
          title: '名称',
          dataIndex: 'name',
          sorter: (a, b) => a.name.localeCompare(b.name)
        },
        {
          title: '负责人',
          render(value, project) {
            return (
              <span>
                {users.find(user => user.id === project.personId)?.name || '未知'}
              </span>
            )
          }
        }
      ]}
      {...props}
    />
  )
}
2
3
4
5
6
7
8
9
10
11
12
13
14
15
16
17
18
19
20
21
22
23
24
25
26
27
28
29
30
31
32
33
34
35
36
37
38
39
40
41
4.2 useAsync 统一处理 Loading 和 Error 状态
utils/use-async.ts:
import { useState } from 'react'

interface State<D> {
  error: Error | null
  data: D | null
  stat: 'idle' | 'loading' | 'error' | 'success'
}

const defaultInitialState: State<null> = {
  stat: 'idle',
  data: null,
  error: null
}

const defaultConfig = {
  throwOnError: false
}

export const useAsync = <D>(
  initialState?: State<D>,
  initialConfig?: typeof defaultConfig
) => {
  const config = { ...defaultConfig, ...initialConfig }
  const [state, setState] = useState<State<D>>({
    ...defaultInitialState,
    ...initialState
  })
  const setData = (data: D) =>
    setState({
      data,
      stat: 'success',
      error: null
    })
  const setError = (error: Error) =>
    setState({
      error,
      stat: 'error',
      data: null
    })
  // run 用来触发异步请求
  const run = (promise: Promise<D>) => {
    if (!promise || !promise.then) {
      throw new Error('请传入 Promise 类型数据')
    }
    setState({ ...state, stat: 'loading' })
    return promise
      .then(data => {
        setData(data)
        return data
      })
      .catch(error => {
        // catch 会消化异常,如果不主动抛出,外面是接收不到异常的
        setError(error)
        if (config.throwOnError) return Promise.reject(error)
        return error
      })
  }
  return {
    isIdle: state.stat === 'idle',
    isLoading: state.stat === 'loading',
    isError: state.stat === 'error',
    isSuccess: state.stat === 'success',
    run,
    setData,
    setError,
    ...state
  }
}
2
3
4
5
6
7
8
9
10
11
12
13
14
15
16
17
18
19
20
21
22
23
24
25
26
27
28
29
30
31
32
33
34
35
36
37
38
39
40
41
42
43
44
45
46
47
48
49
50
51
52
53
54
55
56
57
58
59
60
61
62
63
64
65
66
67
68
index.tsx:
import { Button, Card, Divider, Typography } from 'antd'
import { useState } from 'react'
import { LoginScreen } from './login'
import { RegisterScreen } from './register'
import styled from '@emotion/styled'
import logo from 'assets/logo.svg'
import left from 'assets/left.svg'
import right from 'assets/right.svg'

export const UnauthenticatedApp = () => {
  const [isRegister, setIsRegister] = useState(false)
  const [error, setError] = useState<Error | null>(null)
  return (
    <Container>
      <Background />
      <Header />
      <ShadowCard>
        <Title>{isRegister ? '请注册' : '请登录'}</Title>
        {/* 错误提示 */}
        {error ? (
          <Typography.Text type={'danger'}>{error.message}</Typography.Text>
        ) : null}
        {isRegister ? (
          <RegisterScreen onError={setError} />
        ) : (
          <LoginScreen onError={setError} />
        )}
        <Divider />
        <Button type={'link'} onClick={() => setIsRegister(!isRegister)}>
          {isRegister ? '已经有账号了?直接登录' : '没有账号?注册新账号'}
        </Button>
      </ShadowCard>
    </Container>
  )
}

export const LongButton = styled(Button)`
  width: 100%;
`

const Title = styled.h2`
  margin-bottom: 2.4rem;
  color: rgb(94, 108, 132);
`

const Background = styled.div`
  position: absolute;
  width: 100%;
  height: 100%;
  background-repeat: no-repeat;
  background-attachment: fixed;
  background-position: left bottom, right bottom;
  background-size: calc(((100vw - 40rem) / 2) - 3.2rem), calc(
      ((100vw - 40rem) / 2) - 3.2rem
    ), cover;
  background-image: url(${left}), url(${right});
`

const Header = styled.header`
  background: url(${logo}) no-repeat center;
  padding: 5rem 0;
  background-size: 8rem;
  width: 100%;
`

const ShadowCard = styled(Card)`
  width: 40rem;
  min-height: 56rem;
  padding: 3.2rem 4rem;
  border-radius: 0.3rem;
  box-sizing: border-box;
  box-shadow: rgba(0, 0, 0, 0.1) 0 0 10px;
`

const Container = styled.div`
  display: flex;
  flex-direction: column;
  align-items: center;
  min-height: 100vh;
  text-align: center;
`
2
3
4
5
6
7
8
9
10
11
12
13
14
15
16
17
18
19
20
21
22
23
24
25
26
27
28
29
30
31
32
33
34
35
36
37
38
39
40
41
42
43
44
45
46
47
48
49
50
51
52
53
54
55
56
57
58
59
60
61
62
63
64
65
66
67
68
69
70
71
72
73
74
75
76
77
78
79
80
81
login.tsx:
import { useAuth } from 'context/auth-context'
import { Form, Input } from 'antd'
import { LongButton } from 'unauthenticated-app'
import { useAsync } from 'utils/use-async'

export function LoginScreen({ onError }: { onError: (error: Error) => void }) {
  const { login } = useAuth()
  const { run, isLoading } = useAsync(undefined, { throwOnError: true })

  const handleSubmit = async (values: { username: string; password: string }) => {
    try {
      await run(login(values))
    } catch (e: any) {
      onError(e)
    }
  }
  return (
    <Form onFinish={handleSubmit}>
      <Form.Item
        name={'username'}
        rules={[{ required: true, message: '请输入用户名' }]}>
        <Input placeholder={'用户名'} type={'text'} id={'username'} />
      </Form.Item>
      <Form.Item name={'password'} rules={[{ required: true, message: '请输入密码' }]}>
        <Input placeholder={'密码'} type={'password'} id={'password'} />
      </Form.Item>
      <Form.Item>
        <LongButton loading={isLoading} htmlType={'submit'} type={'primary'}>
          登录
        </LongButton>
      </Form.Item>
    </Form>
  )
}
2
3
4
5
6
7
8
9
10
11
12
13
14
15
16
17
18
19
20
21
22
23
24
25
26
27
28
29
30
31
32
33
34
register.tsx:
import { Form, Input } from 'antd'
import { useAuth } from 'context/auth-context'
import { LongButton } from 'unauthenticated-app'
import { useAsync } from 'utils/use-async'

export function RegisterScreen({ onError }: { onError: (error: Error) => void }) {
  const { register } = useAuth()
  const { run, isLoading } = useAsync(undefined, { throwOnError: true })

  const handleSubmit = async ({
    cpassword,
    ...values
  }: {
    username: string
    password: string
    cpassword: string
  }) => {
    if (cpassword !== values.password) {
      onError(new Error('请确认两次输入的密码相同'))
      return
    }
    try {
      await run(register(values))
    } catch (e: any) {
      onError(e)
    }
  }
  return (
    <Form onFinish={handleSubmit}>
      <Form.Item
        name={'username'}
        rules={[{ required: true, message: '请输入用户名' }]}>
        <Input placeholder={'用户名'} type={'text'} id={'username'} />
      </Form.Item>
      <Form.Item name={'password'} rules={[{ required: true, message: '请输入密码' }]}>
        <Input placeholder={'密码'} type={'password'} id={'password'} />
      </Form.Item>

      <Form.Item
        name={'cpassword'}
        rules={[{ required: true, message: '请确认密码' }]}>
        <Input placeholder={'确认密码'} type={'password'} id={'cpassword'} />
      </Form.Item>

      <Form.Item>
        <LongButton loading={isLoading} htmlType={'submit'} type={'primary'}>
          注册
        </LongButton>
      </Form.Item>
    </Form>
  )
}
2
3
4
5
6
7
8
9
10
11
12
13
14
15
16
17
18
19
20
21
22
23
24
25
26
27
28
29
30
31
32
33
34
35
36
37
38
39
40
41
42
43
44
45
46
47
48
49
50
51
52
4.3 错误边界
error-boundary.ts:
import React from 'react'

type FallbackRender = (props: { error: Error | null }) => React.ReactElement

export class ErrorBoundary extends React.Component<
  React.PropsWithChildren<{ fallbackRender: FallbackRender }>,
  { error: Error | null }
> {
  state = { error: null }

  // 当子组件抛出异常,这里会接收到并调用
  static getDerivedStateFromError(error: Error) {
    return { error }
  }

  render() {
    const { error } = this.state
    const { fallbackRender, children } = this.props
    if (error) return fallbackRender({ error })
    return children
  }
}
2
3
4
5
6
7
8
9
10
11
12
13
14
15
16
17
18
19
20
21
22
App.tsx:
<ErrorBoundary fallbackRender={FullPageErrorFallback}>
  {user ? <AuthenticateApp /> : <UnauthenticatedApp />}
</ErrorBoundary>
2
3
lib.tsx:
export const FullPageErrorFallback = ({ error }: { error: Error | null }) => (
  <FullPage>
    <DevTools />
    <Typography.Text type={'danger'}>{error?.message}</Typography.Text>
  </FullPage>
)
2
3
4
5
6
5.hook 的进一步使用
5.1 useRef 实现 useDocumentTitle
方式一(不推荐):
- 在 utils/index.ts 写一个
useDocumentTitle的 hook:
export const useDocumentTitle = (title: string) => {
  useEffect(() => {
    document.title = title
  }, [title])
}
2
3
4
5
- 在各个页面都引入:
useDocumentTitle('请登录注册以继续')
方式二:
以闭包案例引入
const test = () => {
  let num = 0
  const effect = () => {
    num += 1
    const message = `现在的 num 值: ${num}`
    return function unmount() {
      console.log(message)
    }
  }
  return effect
}
// 执行 test,返回 effect 函数
const add = test()
// 执行 effect 函数,返回引用了 message1 的 unmount 函数
const unmount = add()
// 再一次执行 effect 函数,返回引用了 message2 的 unmount 函数
add()
// 同上,返回引用了 message3 的 unmount 函数
add()
// unmount 执行的是引用了 message1 的 unmount 函数,所以是打印值是 1
unmount() // 打印的不是 3,而是 1!
2
3
4
5
6
7
8
9
10
11
12
13
14
15
16
17
18
19
20
21
代码:
export const useDocumentTitle = (title: string, keepOnUnmount = true) => {
  // useRef 可以保存某一数据的初始值,且在全部周期函数中都不会变化
  const oldTitle = useRef(document.title).current
  // 页面加载时,旧 title
  // 加载后, 新 title
  useEffect(() => {
    document.title = title
  }, [title])
  // 页面卸载时,如果 keepOnmount 为 false,则保留标题
  useEffect(() => {
    return () => {
      if (!keepOnUnmount) {
        // 如果不指定依赖,读到的就是旧 title
        document.title = oldTitle
      }
    }
  }, [keepOnUnmount, oldTitle])
}
2
3
4
5
6
7
8
9
10
11
12
13
14
15
16
17
18
5.2 初步实现 useUrlQueryParam 管理 URL 参数状态
utils/url.ts:
- 返回元组时,需要加上
as const,否则类型推导会发生错误reduce方法的返回类型是reduce方法中第二个参数的类型,所以第二个参数要用断言声明
import { useSearchParams } from 'react-router-dom'

/**
 * 返回页面 url 中,指定键的参数值
 */
export const useUrlQueryParam = (keys: string[]) => {
  const [searchParams, setSearchParam] = useSearchParams()
  return [
    keys.reduce(
      (prev, key) => ({
        ...prev,
        [key]: searchParams.get(key) || ''
      }),
      {} as { [key in string]: string }
    ),
    setSearchParam
  ] as const
}
2
3
4
5
6
7
8
9
10
11
12
13
14
15
16
17
18
5.3 使用 useMemo 解决依赖循环问题
引入:引入类型作为 useEffect 的依赖导致的页面无限刷新问题:
import { useEffect, useState } from 'react'

function App() {
  // 当 obj 是对象的时候,就会无限循环
  /**
   * 原因:页面刚开始渲染的时候,useEffect 会执行一次 setNum(num + 1),这会导致页面的重新渲染。
   * 这时候 obj 也会变化(因为是引用类型),导致又执行了 useEffect,导致无限循环
   */
  const obj = 1
  const [num, setNum] = useState(0)

  useEffect(() => {
    console.log('effect')
    setNum(num + 1)
  }, [obj])

  return <div className='App'>{num}</div>
}

export default App
2
3
4
5
6
7
8
9
10
11
12
13
14
15
16
17
18
19
20
使用 useMemo 解决依赖循环的问题:
useMemo 返回一个 memoized,像 useState 一样会比对前后的值(对象也能比对),从而减少不必要的渲染并解决依赖循环的问题。总结:基本类型可以放在 useEffect 的依赖里;组件状态可以放在依赖里;非组件状态的对象,绝不可以放在依赖里,除非使用 useMemo 进行了包裹
import { useMemo } from 'react'
import { useSearchParams } from 'react-router-dom'

/**
 * 返回页面 url 中,指定键的参数值
 */
export const useUrlQueryParam = <K extends string>(keys: K[]) => {
  const [searchParams, setSearchParam] = useSearchParams()
  return [
    useMemo(
      () =>
        keys.reduce(
          (prev, key) => ({
            ...prev,
            [key]: searchParams.get(key) || ''
          }),
          {} as { [key in K]: string }
        ),
      // eslint-disable-next-line react-hooks/exhaustive-deps
      [searchParams]
    ),
    setSearchParam
  ] as const
}
2
3
4
5
6
7
8
9
10
11
12
13
14
15
16
17
18
19
20
21
22
23
24
5.4 封装 id-select.tsx(贼牛逼)
import { Select } from 'antd'
import { Raw } from 'types'

type SelectProps = React.ComponentProps<typeof Select>

interface IdSelectProps extends Omit<SelectProps, 'value' | 'onChange' | 'options'> {
  value: Raw | null | undefined
  onChange: (value?: number) => void
  defaultOptionName?: string
  options?: { name: string; id: number }[]
}

/**
 * value 可以传入多种类型的值
 * onChange 只会回调 number | undefined 类型
 * 当 isNaN(Number(value)) 为 true 的时候,代表选择默认类型
 * 当选择默认类型的时候,onChange 会回调 undefined
 * @param props
 */
export const IdSelect = (props: IdSelectProps) => {
  const { value, onChange, defaultOptionName, options, ...restProps } = props
  return (
    <Select
      value={toNumber(value)}
      onChange={value => onChange(toNumber(value) || undefined)}
      {...restProps}>
      {defaultOptionName ? (
        <Select.Option value={0}>{defaultOptionName}</Select.Option>
      ) : null}
      {options?.map(option => (
        <Select.Option value={option.id} key={option.id}>
          {option.name}
        </Select.Option>
      ))}
    </Select>
  )
}

const toNumber = (value: unknown) => (isNaN(Number(value)) ? 0 : Number(value))
2
3
4
5
6
7
8
9
10
11
12
13
14
15
16
17
18
19
20
21
22
23
24
25
26
27
28
29
30
31
32
33
34
35
36
37
38
39
在封装 id-select 的基础上再封装 user-select:
import { useUsers } from 'utils/user'
import { IdSelect } from './id-select'

export const UserSelect = (props: React.ComponentProps<typeof IdSelect>) => {
  const { data: users } = useUsers()
  return <IdSelect options={users || []} {...props} />
}
2
3
4
5
6
7
5.5 编辑后刷新 - useState 的懒初始化与保存函数状态
使用
const [state, setState] = useState(() => {})这样初始化,为惰性初始化 state。只会在组件初始渲染中起作用(初始化会直接运行,返回的返回值赋给lazyValue),后续渲染会被忽略。
页面初始化执行 i am lazy,点击按钮执行 updated lazy value:
import React from 'react'

export default function App() {
  const [lazyValue, setLazyValue] = React.useState(() => {
    return 'i am lazy'
  })
  console.log(lazyValue)
  return (
    <div className='App'>
      <button onClick={() => setLazyValue(() => 'updated lazy value')}>
        setCallBack
      </button>
    </div>
  )
}
2
3
4
5
6
7
8
9
10
11
12
13
14
15
利用上述理论实现保存函数:
import React from 'react'

export default function App() {
  const [callback, setCallBack] = React.useState(() => () => {
    alert('init')
  })
  console.log(callback)
  return (
    <div className='App'>
      <button
        onClick={() =>
          setCallBack(() => () => {
            alert('updated lazy value')
          })
        }>
        setCallBack
      </button>
      <button onClick={callback}>call callback</button>
    </div>
  )
}
2
3
4
5
6
7
8
9
10
11
12
13
14
15
16
17
18
19
20
21
使用 useRef 保存函数:
import React from 'react'
import { useRef } from 'react'

export default function App() {
  const callbackRef = useRef(() => alert('init'))
  const callback = callbackRef.current
  console.log(callback)
  return (
    <div className='App'>
      <button
        onClick={() => {
          callbackRef.current = () => alert('updated')
        }}>
        setCallBack
      </button>
      {/* 这里不能使用 callbackRef.current 或 callback,因为 callbackRef 只在初始化时执行 */}
      <button onClick={() => callbackRef.current()}>call callback</button>
    </div>
  )
}
2
3
4
5
6
7
8
9
10
11
12
13
14
15
16
17
18
19
20
5.6 useCallback 和 useMemo
useCallback和useMemo都是为了解决非基本类型的依赖而生的
project.ts:
export const useProjects = (param?: Partial<Project>) => {
  const client = useHttp()
  const { run, ...result } = useAsync<Project[]>()

  const fetchProjects = useCallback(
    () => client('projects', { data: cleanObject(param || {}) }),
    [client, param]
  )

  useEffect(() => {
    // 这里的 run 函数和 fetchProjects 函数都是使用 useCallback 进行包裹的,防止进行无限循环
    run(fetchProjects(), {
      retry: fetchProjects
    })
  }, [param, fetchProjects, run])
  return result
}
2
3
4
5
6
7
8
9
10
11
12
13
14
15
16
17
use-async.ts:
// 用来触发异步请求的
const run = useCallback(
  (promise: Promise<D>, runConfig?: { retry: () => Promise<D> }) => {
    if (!promise || !promise.then) {
      throw new Error('请传入 Promise 类型数据')
    }
    setRetry(() => () => {
      if (runConfig?.retry) {
        run(runConfig?.retry(), runConfig)
      }
    })
    // 这里一定要使用函数形式的 setState,因为 state 不适合作为依赖(state 改变重新执行 run 函数,从而又进行一次 setState,造成无限循环)
    setState(prevState => ({ ...prevState, stat: 'loading' }))
    return promise
      .then(data => {
        if (mountedRef.current) setData(data)
        return data
      })
      .catch(error => {
        // catch 会消化异常,如果不主动抛出,外面是接收到异常的
        setError(error)
        if (config.throwOnError) return Promise.reject(error)
      })
  },
  [config.throwOnError, mountedRef, setData, setError]
)
2
3
4
5
6
7
8
9
10
11
12
13
14
15
16
17
18
19
20
21
22
23
24
25
26
5.7 状态提升、组合组件和控制反转
使用
props传递组件(component composition),能够实现对逻辑的解耦,有时候是要比context更好的解决方案
authenticated-app.tsx:
import styled from '@emotion/styled'
import { ButtonNoPadding, Row } from 'components/lib'
import { useAuth } from 'context/auth-context'
import { ProjectListScreen } from 'screens/project-list'
import { ReactComponent as SoftwareLogo } from 'assets/software-logo.svg'
import { Button, Dropdown, Menu } from 'antd'
import { BrowserRouter as Router, Navigate, Route, Routes } from 'react-router-dom'
import { ProjectScreen } from 'screens/project'
import { resetRoute } from 'utils'
import { useState } from 'react'
import { ProjectModal } from 'screens/project-list/project-modal'
import { ProjectPopover } from 'components/project-popover'

export const AuthenticatedApp = () => {
  const [projectModalOpen, setProjectModalOpen] = useState(false)

  return (
    <Container>
      <PageHeader
        projectButton={
          <ButtonNoPadding onClick={() => setProjectModalOpen(true)} type={'link'}>
            创建项目
          </ButtonNoPadding>
        }
      />
      <Main>
        <Router>
          <Routes>
            <Route
              path={'/projects'}
              element={
                <ProjectListScreen
                  projectButton={
                    <ButtonNoPadding
                      onClick={() => setProjectModalOpen(true)}
                      type={'link'}>
                      创建项目
                    </ButtonNoPadding>
                  }
                />
              }></Route>
            <Route path={'/projects/:projectId/*'} element={<ProjectScreen />}></Route>
            <Route path='/' element={<Navigate to={'/projects'} />}></Route>
          </Routes>
        </Router>
      </Main>
      <ProjectModal
        projectModalOpen={projectModalOpen}
        onClose={() => setProjectModalOpen(false)}
      />
    </Container>
  )
}

const PageHeader = (props: { projectButton: JSX.Element }) => {
  return (
    <Header between={true}>
      <HeaderLeft gap={true}>
        <ButtonNoPadding type={'link'} onClick={resetRoute}>
          <SoftwareLogo width={'18rem'} color={'rgb(38, 132, 255)'} />
        </ButtonNoPadding>
        <ProjectPopover {...props} />
        <span>用户</span>
      </HeaderLeft>
      <HeaderRight>
        <User />
      </HeaderRight>
    </Header>
  )
}

const User = () => {
  const { logout, user } = useAuth()
  return (
    <Dropdown
      overlay={
        <Menu>
          <Menu.Item key={'logout'}>
            <Button type={'link'} onClick={logout}>
              登出
            </Button>
          </Menu.Item>
        </Menu>
      }>
      <Button type={'link'} onClick={e => e.preventDefault()}>
        Hi, {user?.name}
      </Button>
    </Dropdown>
  )
}

const Container = styled.header`
  display: grid;
  grid-template-rows: 6rem 1fr 6rem;
  height: 100vh;
`

const Header = styled(Row)`
  padding: 3.2rem;
  box-shadow: 0 0 5px 0 rgba(0, 0, 0, 0.1);
  z-index: 1;
`

const HeaderLeft = styled(Row)``

const HeaderRight = styled.div``

const Main = styled.main``
2
3
4
5
6
7
8
9
10
11
12
13
14
15
16
17
18
19
20
21
22
23
24
25
26
27
28
29
30
31
32
33
34
35
36
37
38
39
40
41
42
43
44
45
46
47
48
49
50
51
52
53
54
55
56
57
58
59
60
61
62
63
64
65
66
67
68
69
70
71
72
73
74
75
76
77
78
79
80
81
82
83
84
85
86
87
88
89
90
91
92
93
94
95
96
97
98
99
100
101
102
103
104
105
106
107
108
6.redux
6.1 实现 useUndo
import { useCallback, useState } from 'react'

export const useUndo = <T>(initialPresent: T) => {
  const [state, setState] = useState<{
    past: T[]
    present: T
    future: T[]
  }>({
    past: [],
    present: initialPresent,
    future: []
  })

  const canUnodo = state.past.length !== 0
  const canRedo = state.future.length !== 0

  const undo = useCallback(() => {
    setState(currentState => {
      const { past, present, future } = currentState
      if (past.length === 0) return currentState

      const previous = past[past.length - 1]
      const newPast = past.slice(0, past.length - 1)

      return {
        past: newPast,
        present: previous,
        future: [present, ...future]
      }
    })
  }, [])

  const redo = useCallback(() => {
    setState(currentState => {
      const { past, present, future } = currentState
      if (future.length === 0) return currentState

      const next = future[0]
      const newFuture = future.slice(1)

      return {
        past: [...past, present],
        present: next,
        future: newFuture
      }
    })
  }, [])

  const set = useCallback((newPresent: T) => {
    setState(currentState => {
      const { past, present } = currentState
      if (newPresent === present) return currentState

      return {
        past: [...past, present],
        present: newPresent,
        future: []
      }
    })
  }, [])

  const reset = useCallback((newPresent: T) => {
    setState(() => {
      return {
        past: [],
        present: newPresent,
        future: []
      }
    })
  }, [])

  return [state, { set, reset, undo, redo, canUnodo, canRedo }]
}
2
3
4
5
6
7
8
9
10
11
12
13
14
15
16
17
18
19
20
21
22
23
24
25
26
27
28
29
30
31
32
33
34
35
36
37
38
39
40
41
42
43
44
45
46
47
48
49
50
51
52
53
54
55
56
57
58
59
60
61
62
63
64
65
66
67
68
69
70
71
72
73
6.2 用 useReducer 进行状态管理
使用 useReducer 改造 use-async.ts:
import { useReducer } from 'react'
import { useCallback, useState } from 'react'
import { useMountedRef } from 'utils'

interface State<D> {
  error: Error | null
  data: D | null
  stat: 'idle' | 'loading' | 'error' | 'success'
}

const defaultInitialState: State<null> = {
  stat: 'idle',
  data: null,
  error: null
}

const defaultConfig = {
  throwOnError: false
}

const useSafeDispatch = <T>(dispatch: (...args: T[]) => void) => {
  const mountedRef = useMountedRef()
  return useCallback(
    (...args: T[]) => (mountedRef.current ? dispatch(...args) : void 0),
    [dispatch, mountedRef]
  )
}

export const useAsync = <D>(
  initialState?: State<D>,
  initialConfig?: typeof defaultConfig
) => {
  const config = { ...defaultConfig, ...initialConfig }
  const [state, dispatch] = useReducer(
    (state: State<D>, action: Partial<State<D>>) => ({ ...state, ...action }),
    {
      ...defaultInitialState,
      ...initialState
    }
  )
  const safeDispatch = useSafeDispatch(dispatch)
  const [retry, setRetry] = useState(() => () => {})
  const setData = useCallback(
    (data: D) =>
      safeDispatch({
        data,
        stat: 'success',
        error: null
      }),
    [safeDispatch]
  )
  const setError = useCallback(
    (error: Error) =>
      safeDispatch({
        error,
        stat: 'error',
        data: null
      }),
    [safeDispatch]
  )
  // 用来触发异步请求的
  const run = useCallback(
    (promise: Promise<D>, runConfig?: { retry: () => Promise<D> }) => {
      if (!promise || !promise.then) {
        throw new Error('请传入 Promise 类型数据')
      }
      setRetry(() => () => {
        if (runConfig?.retry) {
          run(runConfig?.retry(), runConfig)
        }
      })
      safeDispatch({ stat: 'loading' })
      return promise
        .then(data => {
          return data
        })
        .catch(error => {
          // catch 会消化异常,如果不主动抛出,外面是接收到异常的
          setError(error)
          if (config.throwOnError) return Promise.reject(error)
        })
    },
    [config.throwOnError, setError, safeDispatch]
  )

  return {
    isIdle: state.stat === 'idle',
    isLoading: state.stat === 'loading',
    isError: state.stat === 'error',
    isSuccess: state.stat === 'success',
    run,
    setData,
    setError,
    // retry 被调用时,重新跑一遍 run,让 state 刷新一遍
    retry,
    ...state
  }
}
2
3
4
5
6
7
8
9
10
11
12
13
14
15
16
17
18
19
20
21
22
23
24
25
26
27
28
29
30
31
32
33
34
35
36
37
38
39
40
41
42
43
44
45
46
47
48
49
50
51
52
53
54
55
56
57
58
59
60
61
62
63
64
65
66
67
68
69
70
71
72
73
74
75
76
77
78
79
80
81
82
83
84
85
86
87
88
89
90
91
92
93
94
95
96
97
98
use-undo.ts:
import { useCallback, useReducer } from 'react'

const UNDO = 'UNDO'
const REDO = 'REDO'
const SET = 'SET'
const RESET = 'RESET'

type State<T> = {
  past: T[]
  present: T
  future: T[]
}

type Action<T> = {
  newPresent?: T
  type: typeof UNDO | typeof REDO | typeof SET | typeof RESET
}

const undoReducer = <T>(state: State<T>, action: Action<T>) => {
  const { past, present, future } = state
  const { type, newPresent } = action

  switch (type) {
    case 'UNDO': {
      if (past.length === 0) return state
      const previous = past[past.length - 1]
      const newPast = past.slice(0, past.length - 1)
      return {
        past: newPast,
        present: previous,
        future: [present, ...future]
      }
    }
    case 'REDO': {
      if (future.length === 0) return state
      const next = future[0]
      const newFuture = future.slice(1)
      return {
        past: [...past, present],
        present: next,
        future: newFuture
      }
    }
    case 'SET': {
      if (newPresent === present) return state
      return {
        past: [...past, present],
        present: newPresent,
        future: []
      }
    }
    case 'RESET': {
      return {
        past: [],
        present: newPresent,
        future: []
      }
    }
  }
}

export const useUndo = <T>(initialPresent: T) => {
  const [state, dispatch] = useReducer(undoReducer, {
    past: [],
    present: initialPresent,
    future: []
  } as State<T>)

  const canUnodo = state.past.length !== 0
  const canRedo = state.future.length !== 0

  const undo = useCallback(() => dispatch({ type: 'UNDO' }), [])

  const redo = useCallback(() => dispatch({ type: 'REDO' }), [])

  const set = useCallback((newPresent: T) => dispatch({ type: 'SET', newPresent }), [])

  const reset = useCallback(
    (newPresent: T) => dispatch({ type: 'RESET', newPresent }),
    []
  )

  return [state, { set, reset, undo, redo, canUnodo, canRedo }]
}
2
3
4
5
6
7
8
9
10
11
12
13
14
15
16
17
18
19
20
21
22
23
24
25
26
27
28
29
30
31
32
33
34
35
36
37
38
39
40
41
42
43
44
45
46
47
48
49
50
51
52
53
54
55
56
57
58
59
60
61
62
63
64
65
66
67
68
69
70
71
72
73
74
75
76
77
78
79
80
81
82
83
84
6.3 redux-tookit
- 安装:
yarn add react-redux @reduxjs/toolkit - store/index.tsx:
import { configureStore } from '@reduxjs/toolkit'
import { projectListSlice } from 'screens/project-list/project-list.slice'

export const rootReducer = {
  kanbanList: projectListSlice.reducer
}

export const store = configureStore({
  reducer: rootReducer
})

export type AppDispatch = typeof store.dispatch
export type RootState = ReturnType<typeof store.getState>
2
3
4
5
6
7
8
9
10
11
12
13
- src/screens/project-list/project-list.slice.ts:
import { createSlice } from '@reduxjs/toolkit'

interface State {
  projectModalOpen: boolean
}

const initialState: State = {
  projectModalOpen: false
}

export const projectListSlice = createSlice({
  name: 'projectListSlice',
  initialState,
  reducers: {
    openProjectModal(state, action) {
      state.projectModalOpen = true
    },
    closeProjectModal(state, action) {
      state.projectModalOpen = false
    }
  }
})

export const projectListActions = projectListSlice.actions
2
3
4
5
6
7
8
9
10
11
12
13
14
15
16
17
18
19
20
21
22
23
24
6.4 使用 redux-toolkit 管理模态框
src/store/index.tsx:
import { configureStore } from '@reduxjs/toolkit'
import { projectListSlice } from 'screens/project-list/project-list.slice'

// 创建根 reducer
export const rootReducer = {
  // 根 reducer 中包括子 reducer 的切片
  projectList: projectListSlice.reducer
}

// 创建 store,存放根 reducer
export const store = configureStore({
  reducer: rootReducer
})

// dispatch 的类型
export type AppDispatch = typeof store.dispatch
// state 的类型
export type RootState = ReturnType<typeof store.getState>
2
3
4
5
6
7
8
9
10
11
12
13
14
15
16
17
18
src/screens/project-list.slice.ts:
import { createSlice } from '@reduxjs/toolkit'
import { RootState } from 'store'

interface State {
  projectModalOpen: boolean
}

const initialState: State = {
  projectModalOpen: false
}

// slice 切片
export const projectListSlice = createSlice({
  name: 'projectListSlice',
  initialState,
  reducers: {
    // 第二个参数为 action,state 会根据 initialState 做自动推断
    openProjectModal(state) {
      state.projectModalOpen = true
    },
    closeProjectModal(state) {
      state.projectModalOpen = false
    }
  }
})

// 操作 state 的方法
export const projectListActions = projectListSlice.actions
// 将切片的 state 传出
export const selectProjectModalOpen = (state: RootState) =>
  state.projectList.projectModalOpen
2
3
4
5
6
7
8
9
10
11
12
13
14
15
16
17
18
19
20
21
22
23
24
25
26
27
28
29
30
31
使用 state 和使用 action 实例:
import { Button, Drawer } from 'antd'
import { useDispatch, useSelector } from 'react-redux'
import { projectListActions, selectProjectModalOpen } from './project-list.slice'

export const ProjectModal = () => {
  const dispatch = useDispatch()
  const projectModalOpen = useSelector(selectProjectModalOpen)
  return (
    <Drawer
      open={projectModalOpen}
      onClose={() => dispatch(projectListActions.closeProjectModal())}
      width={'100%'}>
      <h1>Project Modal</h1>
      <Button onClick={() => dispatch(projectListActions.closeProjectModal())}>
        关闭
      </Button>
    </Drawer>
  )
}
2
3
4
5
6
7
8
9
10
11
12
13
14
15
16
17
18
19
auth.slice.ts:
redux 中使用异步函数
import { createSlice } from '@reduxjs/toolkit'
import { User } from 'screens/project-list/search-panel'
import * as auth from 'auth-provider'
import { AuthForm, bootstrapUser } from 'context/auth-context'
import { AppDispatch, RootState } from 'store'

interface State {
  user: User | null
}

const initialState: State = {
  user: null
}

export const authSlice = createSlice({
  name: 'auth',
  initialState,
  reducers: {
    setUser(state, action) {
      state.user = action.payload
    }
  }
})

const { setUser } = authSlice.actions

export const selectUser = (state: RootState) => state.auth.user

// 下面都是 thunk(异步函数)
export const login = (form: AuthForm) => (dispatch: AppDispatch) =>
  auth.login(form).then(user => dispatch(setUser(user)))
export const register = (form: AuthForm) => (dispatch: AppDispatch) =>
  auth.register(form).then(user => dispatch(setUser(user)))
export const logout = () => (dispatch: AppDispatch) =>
  auth.logout().then(() => dispatch(setUser(null)))
export const bootstrap = () => (dispatch: AppDispatch) =>
  bootstrapUser().then(user => dispatch(setUser))
2
3
4
5
6
7
8
9
10
11
12
13
14
15
16
17
18
19
20
21
22
23
24
25
26
27
28
29
30
31
32
33
34
35
36
37
store/index.ts:
import { configureStore } from '@reduxjs/toolkit'
import { projectListSlice } from 'screens/project-list/project-list.slice'
import { authSlice } from './auth.slice'

// 创建根 reducer
export const rootReducer = {
  // 根 reducer 中包括子 reducer 的切片
  projectList: projectListSlice.reducer,
  auth: authSlice.reducer
}

// 创建 store,存放根 reducer
export const store = configureStore({
  reducer: rootReducer
})

// dispatch 的类型
export type AppDispatch = typeof store.dispatch
// state 的类型
export type RootState = ReturnType<typeof store.getState>
2
3
4
5
6
7
8
9
10
11
12
13
14
15
16
17
18
19
20
使用:
import * as authStore from 'store/auth.slice'

export const useAuth = () => {
  const dispatch = useDispatch<AppDispatch>()
  const user = useSelector(authStore.selectUser)
  const login = useCallback(
    (form: AuthForm) => dispatch(authStore.login(form)),
    [dispatch]
  )
  const register = useCallback(
    (form: AuthForm) => dispatch(authStore.register(form)),
    [dispatch]
  )
  const logout = useCallback(() => dispatch(authStore.logout()), [dispatch])
  return {
    user,
    login,
    register,
    logout
  }
}
2
3
4
5
6
7
8
9
10
11
12
13
14
15
16
17
18
19
20
21
7.url
7.1 用 url 参数管理项目模态框状态
src/screens/project-list/util.ts:
export const useProjectModal = () => {
  // 下面一行作用是将 url 参数中键为 projectCreate 的键值对取出来,并且初始化设定 projectCreate 的方法
  const [{ projectCreate }, setProjectCreate] = useUrlQueryParam(['projectCreate'])
  const open = () => setProjectCreate({ projectCreate: true })
  const close = () => setProjectCreate({ projectCreate: undefined })
  return {
    projectModalOpen: projectCreate === 'true',
    open,
    close
  }
}
2
3
4
5
6
7
8
9
10
11
简单使用:
import React from 'react'
import { Button, Drawer } from 'antd'
import { useProjectModal } from './util'

export const ProjectModal = () => {
  const { projectModalOpen, close } = useProjectModal()
  return (
    <Drawer onClose={close} visible={projectModalOpen} width={'100%'}>
      <h1>Project Modal</h1>
      <Button onClick={close}>关闭</Button>
    </Drawer>
  )
}
2
3
4
5
6
7
8
9
10
11
12
13
7.2 用 react-query 来处理 - 服务端缓存
前置知识:类型守卫:
// 类型守卫(当 value: any 符合 value?.message 条件时,即拥有 message 属性时,视之为 Error 类型)
const isError = (value: any): value is Error => value?.message
export const ErrorBox = ({ error }: { error: unknown }) => {
  if (isError(error)) {
    return <Typography.Text type={'danger'}>{error.message}</Typography.Text>
  }
  return null
}
2
3
4
5
6
7
8
7.3 乐观更新
举例:点击收藏按钮,还未等后端进行确认,前端就已经点亮收藏的图标了;如果后端报错,则前端进行回滚
export const useEditProject = () => {
  const client = useHttp()
  const queryClient = useQueryClient()
  const [searchParams] = useProjectsSearchParams()
  const queryKey = ['projects', searchParams]
  return useMutation(
    (params: Partial<Project>) =>
      client(`projects/${params.id}`, {
        method: 'PATCH',
        data: params
      }),
    {
      onSuccess: () => queryClient.invalidateQueries(queryKey),
      async onMutate(target) {
        const previousItems = queryClient.getQueryData(queryKey)
        queryClient.setQueryData(queryKey, (old?: Project[]) => {
          return (
            old?.map(project =>
              project.id === target.id ? { ...project, ...target } : project
            ) || []
          )
        })
        return { previousItems }
      },
      onError(error, newItem, context) {
        queryClient.setQueryData(
          queryKey,
          (context as { previousItems: Project[] }).previousItems
        )
      }
    }
  )
}
2
3
4
5
6
7
8
9
10
11
12
13
14
15
16
17
18
19
20
21
22
23
24
25
26
27
28
29
30
31
32
33